我的博客开发之Quill
1 views
简介:
去年用Vue全家桶 + MongoDB + Egg.js搭建了一个简易的博客,接触React一年多了,是时候展现真正的技术了,用React来重构我的博客系统。
作为一个博客系统,新建、编辑文章便是整个系统的核心,所以在文本编辑器这里纠结了好久,脑海中有印象的大概有
编辑器的需求:
- 正常的文字编辑(markdown的基本内容,这个基本上所有的编辑器都有)
- 支持代码格式(毕竟是博客多是用来编写技术分享之类的文字,code支持为刚需,代码高亮)
- 可导出浏览器易解析的文章格式(常见的多直接是html标签,缺点是非浏览器不好解析)
- 支持媒体上传(图片为刚需、视频支持最好)
- 扩展性好(方便后续进行针对性的扩展)
- 颜值过的去(对于颜值还是有一点点需求的)
综合上述的需求,Quill是我最好的选择,star也很高,Ant Design社区也有推荐。这里还有官方给出的一篇文章
Quill小试牛刀:
如何在项目中使用Quill编辑器,官方的document其实已经说的很明白了,这里只是简单记录📝一下过程和中间遇到的问题,毕竟好记性不如烂笔头😅。以下都是基于我博客开发使用Quill编辑器的上手记录(博客是React框架)。
1.项目中安装Quill
npm install quill@1.3.62.在页面中使用
// 引入quill及相关样式import React, { PureComponent } from 'react';import Quill from 'quill';import 'quill/dist/quill.snow.css';
class Edit extends PureComponent {  componentDidMount = () => {    this._initQuill();  };
  // 初始化Quill  _initQuill = () => {    let options = {      debug: 'false',      modules: {        toolbar: {          container: [            ['bold', 'italic', 'underline', 'strike'], // toggled buttons            ['blockquote', 'code-block'],            [{ header: [1, 2, 3, 4, 5, 6, false] }], // custom button values            [{ list: 'ordered' }, { list: 'bullet' }],            [{ color: [] }, { background: [] }], // dropdown with defaults from theme            [{ font: [] }],            [{ align: [] }],            ['link', 'image'],            ['emoji'],            ['clean'] // remove formatting button          ]        }      },
      placeholder: 'Write something...',      // readOnly: true,      theme: 'snow'    };
    this.richText = new Quill('#admin-edit-richtext', options);  };
  render() {    return (      <div className='edit'>        <div id='admin-edit-richtext' />      </div>    );  }}
现在页面中就会出现quill的编辑器了,可以根据自己的需要去布局想要显示的位置。
3.个性化配置
代码高亮:
基于
// 安装highlightjsnpm install highlight.js
// 在页面中引入highlight.js和相关样式文件// edit.tsx 页面中import hljs from 'highlight.js';import 'highlight.js/styles/darcula.css';    这个是我vsCode中的主题,可以到自行替换其它高亮样式
// 配置highlight// 在_initQuill函数中添加以下代码
_initQuill = () => {  // 此配置一定要在实例化Quill编辑器前,相当于注册配置  hljs.configure({    languages: ['javascript', 'php', 'python']  });

  let options = {      debug: 'false',      modules: {        // syntax: true,这是官方给的实例,这里是坑,经过一番查看,大概就是highlight是基于<pre><code></code></pre>标签实现高亮,但是quill中没有,所以这样写是不能实现,⏬换成下方的即可。        syntax:  {          highlight: (text: string) => hljs.highlightAuto(text).value,        },        toolbar: {}      }  }
}
自定义图片处理函数:
自定义上传图片函数,可用于压缩图片、上传图片到七牛云等CDN,返回图片链接然后在对应位置插入图片。
// 在quill的配置项中添加
_initQuill = () => {  let options = {    debug: 'false',    modules: {      syntax:  {        highlight: (text: string) => hljs.highlightAuto(text).value,      },      toolbar: {        container: [],        handlers: {          image: this.imageHandle,   // 在这里自定义处理函数        },      },    },    placeholder: 'Write something...',    // readOnly: true,    theme: 'snow',  };  this.richText = new Quill('#admin-edit-richtext', options)}
// 自定义图片处理函数imageHandle = () => {  let richEdit = this.richText  const input = document.createElement('input')  input.setAttribute('type', 'file')  input.setAttribute('accept', 'image/*')  input.click()  input.onchange = () => {      // 上传文件到服务器 构建formData      const file = input.files[0]      const formData = new FormData()      formData.append('file', file)      this.uploadFile(formData, (url) => {        // 待服务器返回图片的url,获取图片插入的位置,并通过insertEmbed(index, 'image', url)插入到对应位置        const range = richEdit.getSelection()        richEdit.insertEmbed(range.index, 'image', url)      })      // this part the image is inserted      // by 'image' option below, you just have to put src(link) of img here.  }}
Emoji表情的添加:
和代码高亮类似,基于
// 安装npm install quill-emoji
// 页面中引入相关文件 edit.tsximport emoji from 'quill-emoji'import 'quill-emoji/dist/quill-emoji.css'
// 配置
_initQuill = () => {  hljs.configure({});
  // 注册后方可使用  Quill.register({    'formats/emoji': EmojiBlot,    'modules/emoji-shortname': ShortNameEmoji,    'modules/emoji-toolbar': ToolbarEmoji,    'modules/emoji-textarea': TextAreaEmoji,  }, true);
  let options = {    debug: 'false',    modules: {      syntax:  {        highlight: (text: string) => hljs.highlightAuto(text).value,      },      toolbar: {        container: [],        handlers: {          image: this.imageHandle,          emoji: function() {}        },      },      'emoji-toolbar': true,  //是否展示出来      "emoji-textarea": false, //我不需要emoji展示在文本框所以设置为false      "emoji-shortname": true,    },
    placeholder: 'Write something...',    // readOnly: true,    theme: 'snow',  };  this.richText = new Quill('#admin-edit-richtext', options)}
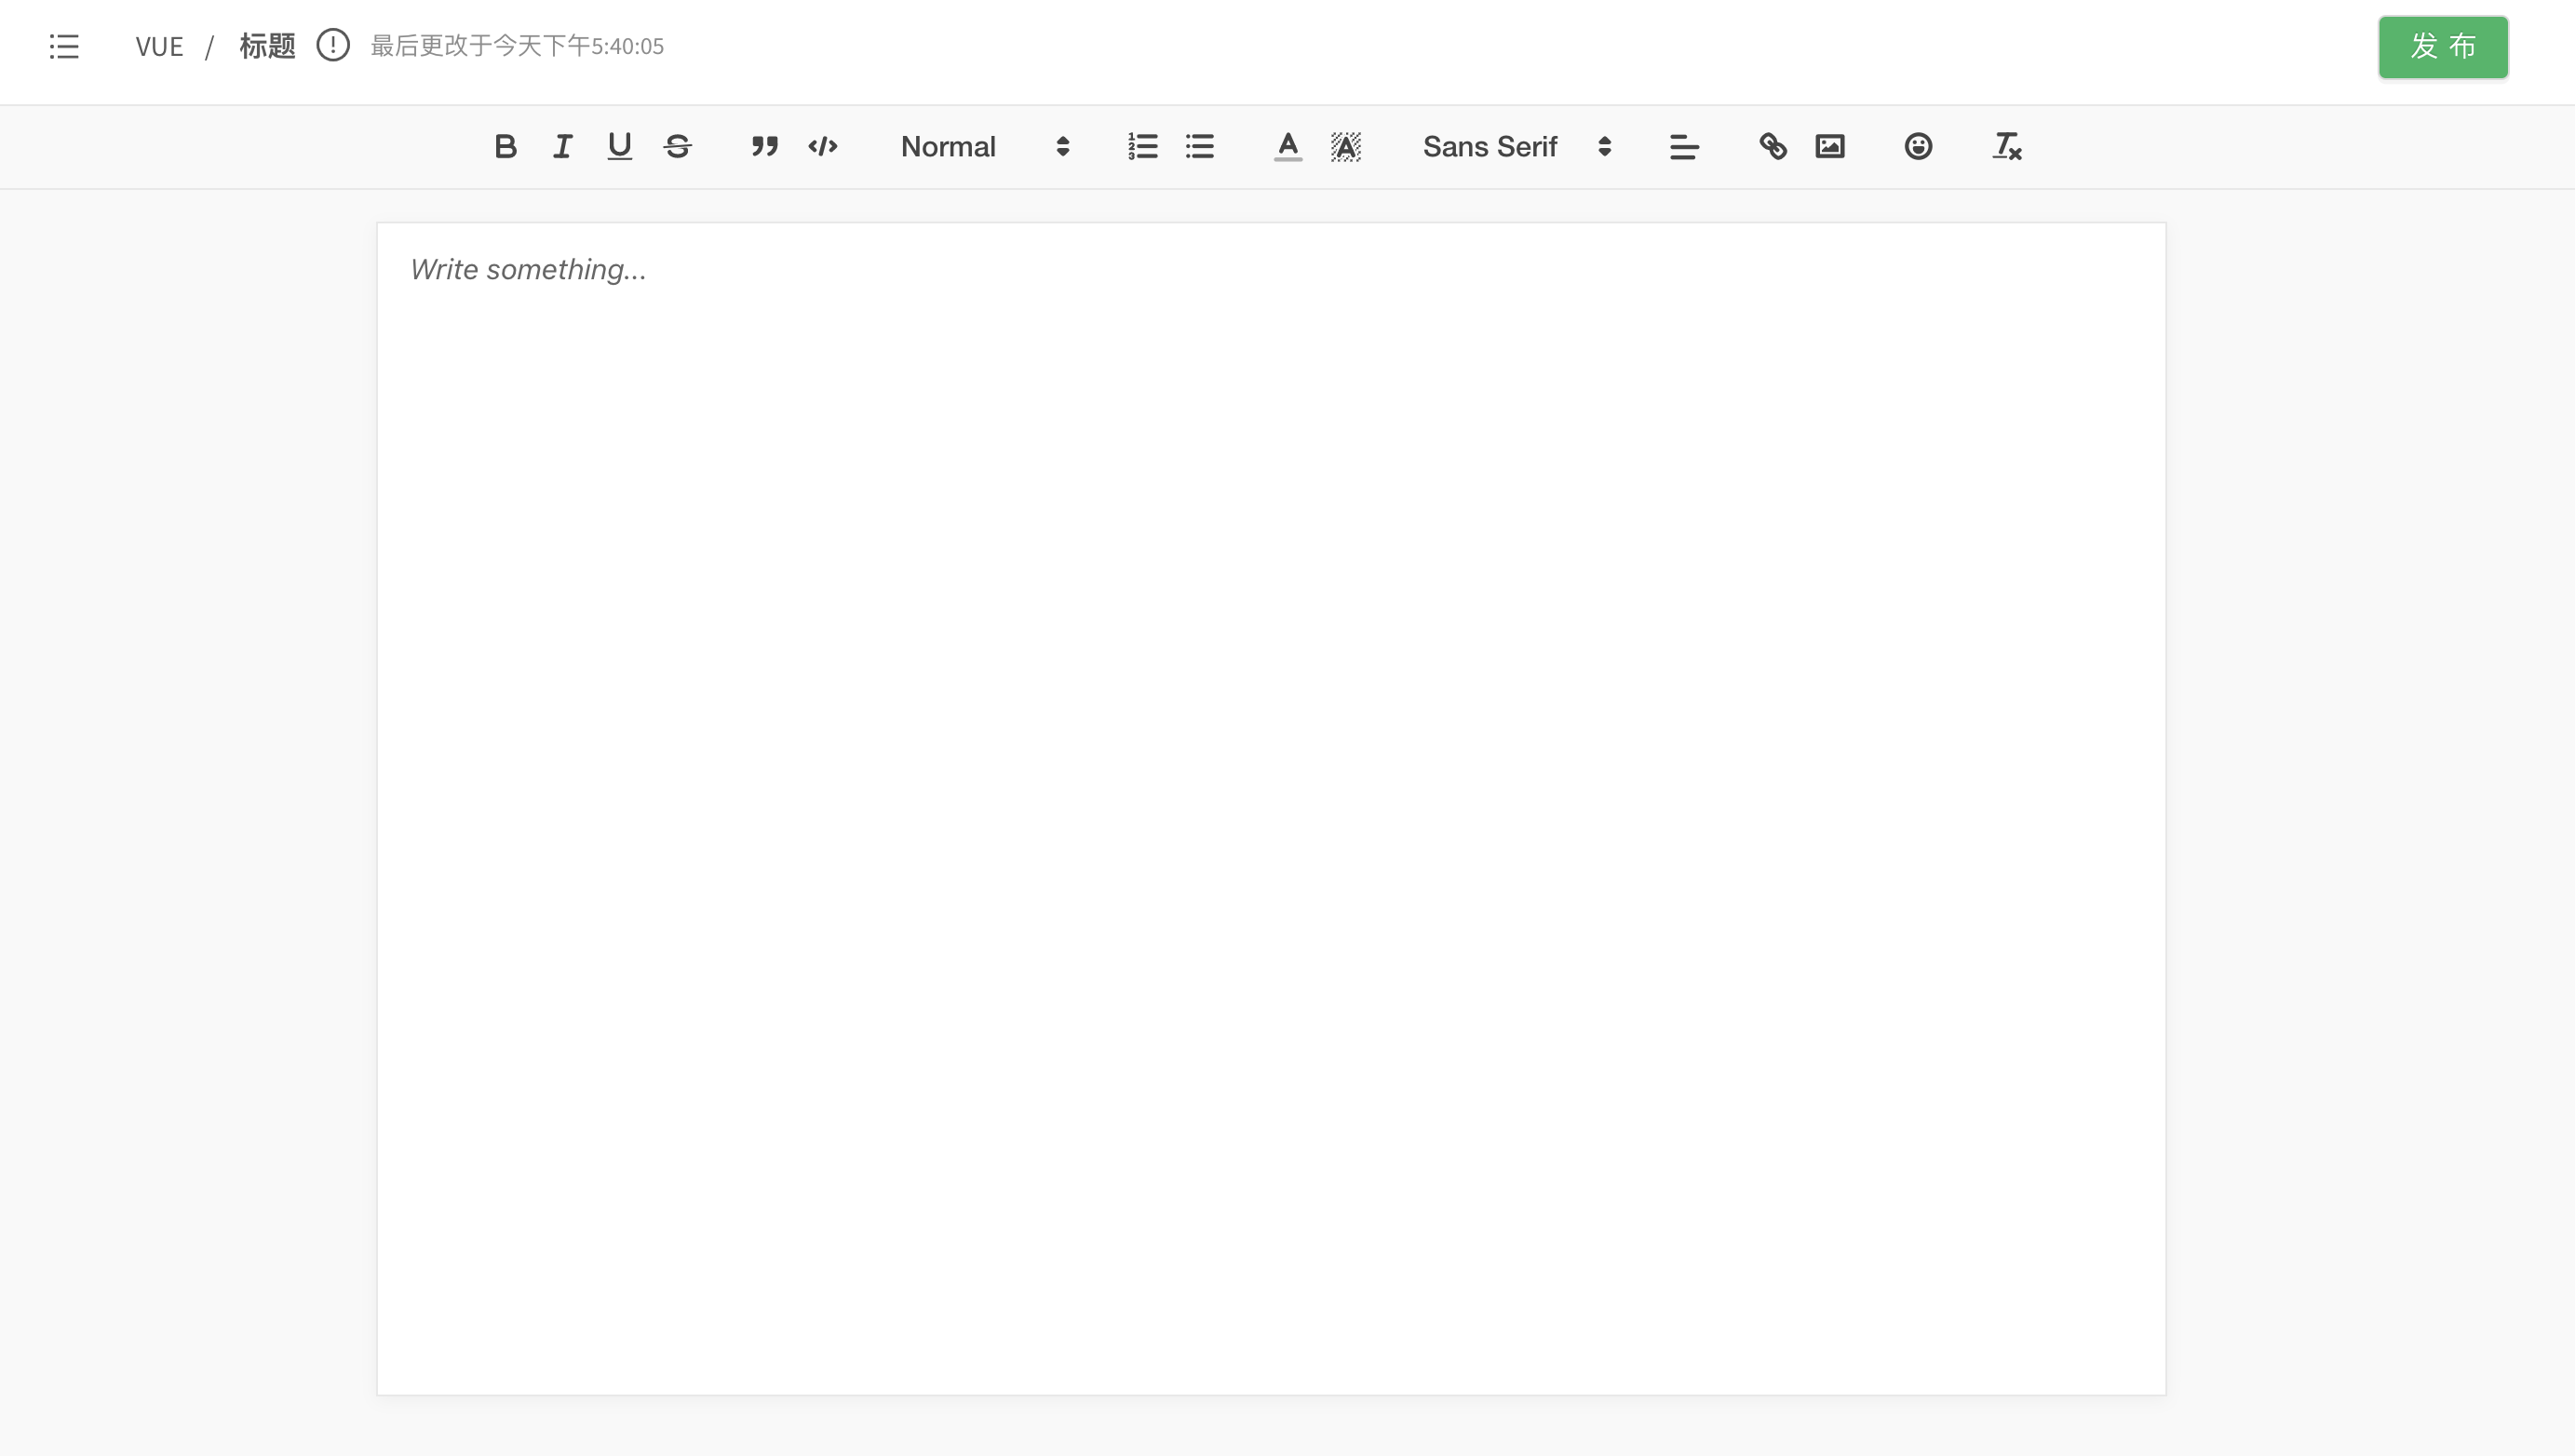
然后我的Quill编辑器基本就差不多了,样式我大概按语雀的布局写了一下,效果图如下:
4.部分API的使用:
大概看了一下,目前用到的不多,
getSelection()
检索用户的选择范围,可选地首先关注编辑器。除此之外,如果编辑没有焦点,可能会返回一个null
insertEmbed()
向编辑器中插入嵌入式内容,返回一个改变后的Delta对象。操作来源可能为:‘user’、‘api’或者‘silent’。当编辑器被禁用时,来源‘user’将被忽略。
getLength()
检索返回编辑器的内容长度。注意:即使Quill是空的,编辑器仍然有一个‘\n’表示的空行,所以getLength将返回1。
focus()
编辑器获取焦点到最后位置。用于实例化完立即聚焦到编辑器。
on()
添加事件监听。有关事件本身的更多信息
quill.on('text-change', function () { console.log('Text change!'); // 我在text-change调用了quill.getLength()});getContents()
检索编辑器的内容,格式化返回一个quill.container.innerHTML 获取到,直接渲染到HTML中即可显示。
以上就是我目前在我的博客系统中对于Quill富文本编辑器的一些记载和遇到的问题,仅供参考鸭🦆~ 有问题可留言交流。